How to create a Genesis child theme from scratch from the Genesis Framework that looks like the parent theme, using HTML5 , footer widgets, custom backgrounds and enable the viewport setting that allows for responsive design on tablet/mobile devices.
Install Genesis Framework
First grab the Genesis framework and upload the theme into WordPress via the Dashboard, Appearance > Upload.
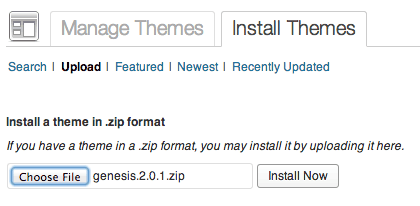

After upload do not activate.
Create a Child Theme
Ok so first create the child theme in the same way as any other WordPress child theme. Here we are using the name ‘genesischild‘ and a folder needs to be created; ‘genesischild‘ in /wp-content/themes/ with a ‘style.css‘ file with the following content:
/*
Theme Name: genesischild
Theme URI: http://coolestguidesontheplanet.com
Description: Designed by <a href="http://coolestguidesontheplanet.com">Neil Gee</a>.
Author: Neil Gee
Version: 0.1
Template: genesis
Tags: the child of genesis

*/
@import url('../genesis/style.css');
This is the standard child theme declaration with the Theme Name and Template being the all important compulsory fields.
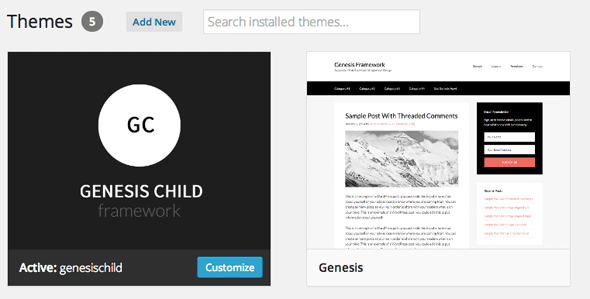
After this you will be able to activate it via the Appearance > Themes in the WordPress Dashboard. (I have also copied across the screenshot.png from the parent Genesis Theme and filed it in the genesischild directory, you can add in a different image to visually identify the difference between the themes, just keep the format and dimensions the same, otherwise there is no image, this is optional).
Differences Between The Parent and Child Theme
There is a big difference in appearance of the Genesis framework parent and child theme – with other child themes, the child theme takes on the look and feel of their parent, but Genesis child theme out of the box looks like crapola as a number of features need to be enabled.
Genesis Framework Parent Theme
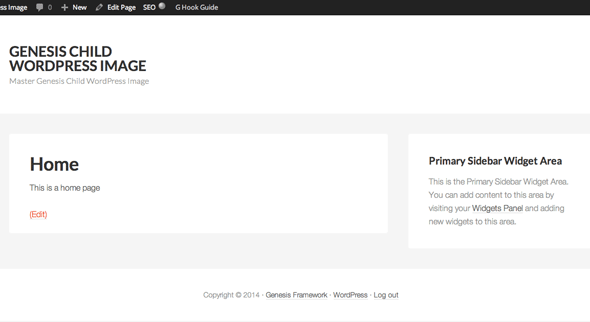
Looking good, Genesis Framework Parent Theme – HTML 5, responsive and widgets activated.
Genesis Child Theme
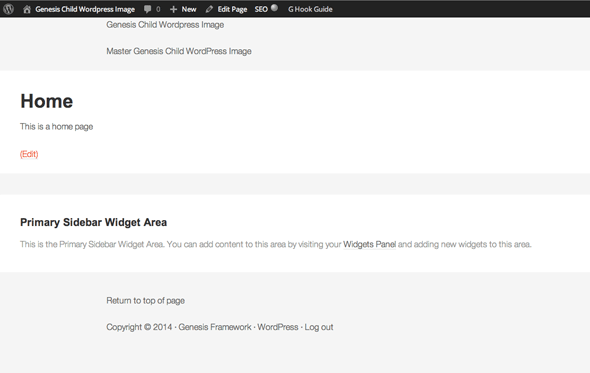
Genesis default child does not render as HTML5, and does not display the same structural layout with pixel page widths using the same CSS as the parent – looks like the backbone has been taken out. This is because these features are theme supports which you need to enable in the Child Theme.
Things to Fix
Copy/Paste The Parent CSS
First up is to copy/paste the parents CSS code into the child style.css file instead of relying on the import of the parent CSS style, this will allow you to change the CSS in your child theme for everything and not be affected by any updates to the CSS when Genesis is upgraded, this won’t change the other issues right now, but will future proof the child theme but is recommended by StudioPress the Genesis vendor.
Remove this in your child theme’s style.css
@import url('../genesis/style.css');
Then copy everything in the parents style.css file from /*Table of contents to the end of the file:
/* Table of Contents
Actions and Filters Hooks and Functions
To get things going like the framework parent theme you need to create a functions.php file in your child theme and start bringing some functions across.
Most Genesis Child Themes start with the following:
<?php
// Start the engine
require_once( get_template_directory() . '/lib/init.php' );
The Genesis framework and functions are accessed from the /lib/init.php, if you look at this file it is in essence the function file of the parent Genesis theme, the actual parent function.php file calls the same file. But this still won’t fix the layout issue.
If we look at the parent Genesis /lib/init.php file the reason why the theme supports of html5, viewport and footer widgets is displayed why at lines 66 – 73, these theme support functions are being disabled for Child Themes, why it is set up like this I don’t know, odd!, what it is saying is that if the theme is a child theme then do not add support for HTML5, viewport tag and footer widgets – but we want these for the child theme in modern web design.
One of the reasons probably is that Genesis is being backward compatible to support its framework prior to the current version which also supports XHTML structure as well as HTML5, so the theme support functions just need to be enabled depending on the website requirements.
//* Turn on HTML5, responsive viewport & footer widgets if Genesis is active
if ( ! is_child_theme() ) {
add_theme_support( 'html5' );
add_theme_support( 'genesis-responsive-viewport' );
add_theme_support( 'genesis-footer-widgets', 3 );
	}
So lets add these into our child theme functions.php file:
<?php
// Start the engine
require_once( get_template_directory() . '/lib/init.php' );

add_theme_support( 'html5' );
add_theme_support( 'genesis-responsive-viewport' );
add_theme_support( 'genesis-footer-widgets', 3 );
So here we are adding in support for HTML5 elements and mark-up, the meta tag viewport in the head allowing the site to be rendered at a device width making it responsive and a further 3 footer widgets ready to go at the bottom of the page.
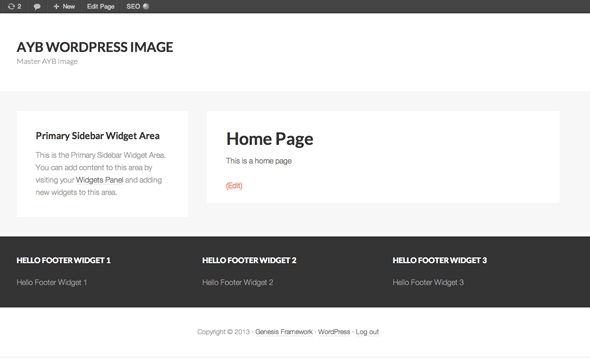
Looking much better already
Another preferred approach to setting up the child theme in Genesis with functions is to use a Genesis action called genesis_setup and then create a function that allows us to load all our functions of our Child Theme after the parent theme functions have already loaded.
<?php

add_action('genesis_setup','genesischild_theme_setup');
function genesischild_theme_setup() {
//code goes here

}
So here we are adding an action called genesis_setup which is the same as the WordPress action named after_setup_theme, this action hook is called after the page loads, in the code above we are passing a custom PHP function into the genesis_setup action hook called genesischild_theme_setup and then declaring that same function underneath, this function will execute once the page loads.
You can name the function what you like as long as what you pass the same function name into the action hook above it, so in the above case it is genesis_theme_setup
With that done, we can add in our missing theme support functions:
<?php
// Start the engine the other way

add_action('genesis_setup','genesischild_theme_setup');
function genesischild_theme_setup() {

add_theme_support( 'html5' );
add_theme_support( 'genesis-responsive-viewport' );
add_theme_support( 'genesis-footer-widgets', 3 );

}
Creating the child theme this way conforms to the WordPress standard of loading the child theme functions first and the parent functions after and the /lib/init.php file from the Framework does not have to be called.
Anyway the idea here is to add in any theme support functions, custom filters and actions inside the genesischild_theme_setup function for additional unique functions add them after the closing curly brace.
There you have it the child now looks like the parent.
Adding in Custom Background Support for Genesis Child Themes
One further addition should be made to the child theme which makes it easier to do custom backgrounds with either images or flat colors via WordPress dashboard:
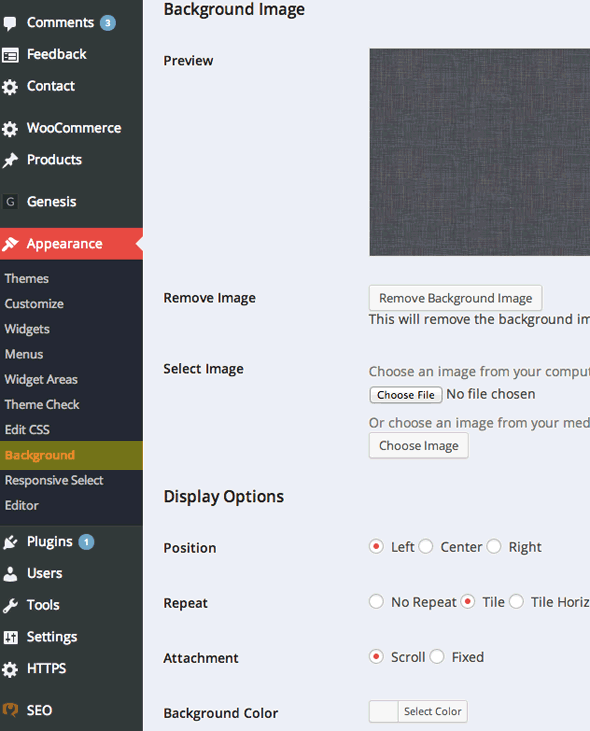
So under Appearance > Background you can control the overall background of the site; you do this by adding in support for custom backgrounds also in the functions.php file.
//* Add support for custom background
add_theme_support( 'custom-background' );
So our functions.php file will be like so:
<?php
// Start the engine the other way

add_action('genesis_setup','genesischild_theme_setup', 15);
function genesischild_theme_setup() {

//Add support for HTML5 markup
add_theme_support( 'html5' );
//Add viewport metatag
add_theme_support( 'genesis-responsive-viewport' );
//Add 3 footer widgets
add_theme_support( 'genesis-footer-widgets', 3 );
//Add support for custom background
add_theme_support( 'custom-background' );

}
There you have it, a clean skinned Genesis child the same as the original Framework.
My starter theme can be downloaded and used from GitHub , this is a theme I use to start projects and is updated with what I need.