This is a 4 part reference guide to getting started with Vagrant, VVV and WordPress.
This is Part 1 – Vagrant – Getting Started on macOS
Vagrant is a bit of an odd name for a software app but kind of follows along the trend of naming like Git.It has been around for over 12 months and is an open source project. It essentially builds virtual images from references (boxes) of a type of operating system with applications and dependent software, this can be referenced in a template file that is given to users on a group project to ensure that their development environment is the same as everybody elses as it is using the same virtual image. Sort of like making sure everyone is singing from the same hymn book.
It is also great for checking a development that is built on a different environment to which it is being deployed, so you can set up the target environment in a virtual instance to test.
Installing Vagrant
Download the latest installer, for macOS there is a point and click .dmg installer.

Expand the .dmg and install the Vagrant.pkg package file. The binary gets installed in the Applications folder with a link to the /usr/bin so it is added to the shell path.
The user data for Vagrant is filed in the directory from which vagrant was used and is stored in an invisible directory named .vagrant.d
Upgrading Vagrant on macOS
You can check the version of vagrant you have by typing:
vagrant -v
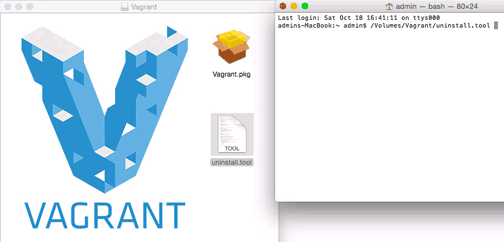
If you want to upgrade to a later version just download the latest installer and drag and drop the uninstall.tool onto an open Terminal window and follow the process, then install the Vagrant.pkg file or simply just install the new version over the top of the older one e.g 1.9.4 -> 2.0.0
Using a Virtual Machine
Along with Vagrant you need to use a VM solution to store the image or box, some solutions include VMWare and AWS but Virtual Box is a free and popular solution. This needs to be downloaded and installed on your local machine.
If you are just interested in Vagrant, VVV and WordPress then move onto the next part – from here it goes through just more on vagrant and using it with a VM and a box not WordPress or VVV related.
Creating a Vagrant Template File
Change directory to where you want to store the Vagrant project and run
vagrant init
This will place a set up file named Vagrantfile in that top level. After the Vagrantfile has been created the next step is to pull the image or box that will be used.
Vagrant Boxes
You can see a bunch of Vagrant boxes on the Vagrant Cloud website that you can download and use.
To add a box using one of the examples:
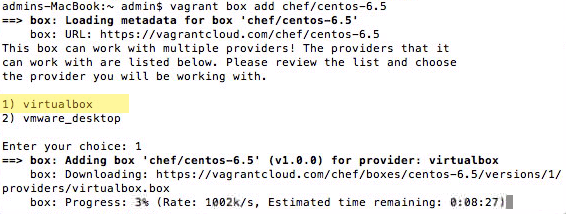
vagrant box add chef/centos-6.5

This will download the Centos 6.5 box to the current directory, if asked select the relevant VM solution such as Virtual Box. The original box is always left intact and can be used across multiple projects, the Vagrant image built is based from the box.
Configure Vagrant to use the Box
After the box has downloaded we need to tell Vagrant which box to use in the current project, this is done in the Vagrantfile created earlier, using you preferred Terminal editor:
nano Vagrantfile
Find and change
 # Every Vagrant virtual environment requires a box to build off of.
  config.vm.box = "base"
To the box name, so in this example:
 # Every Vagrant virtual environment requires a box to build off of.
  config.vm.box = "chef/centos-6.5"
Boot the Box – Vagrant Up
The next step is to boot the box up which is done with the most popular vagrant command:
vagrant up
Which will run through a series of start up steps
neilg@[~/vagrantstart]: vagrant up
Bringing machine 'default' up with 'virtualbox' provider...
==> default: Importing base box 'chef/centos-6.5'...
==> default: Matching MAC address for NAT networking...
==> default: Checking if box 'chef/centos-6.5' is up to date...
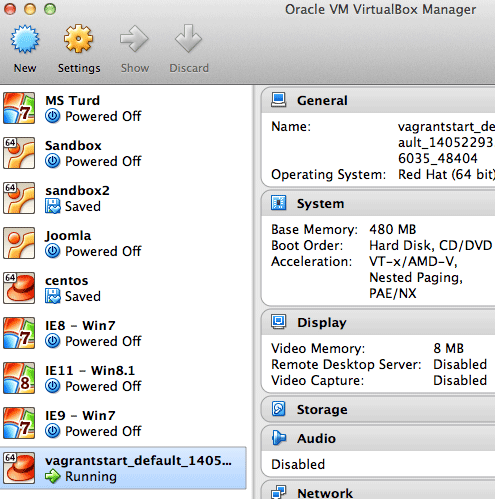
==> default: Setting the name of the VM: vagrantstart_default_1405229326035_48404
==> default: Clearing any previously set network interfaces...
==> default: Preparing network interfaces based on configuration...
default: Adapter 1: nat
==> default: Forwarding ports...
default: 22 => 2222 (adapter 1)
==> default: Booting VM...
==> default: Waiting for machine to boot. This may take a few minutes...
default: SSH address: 127.0.0.1:2222
default: SSH username: vagrant
default: SSH auth method: private key
default: Warning: Connection timeout. Retrying...
==> default: Machine booted and ready!
==> default: Checking for guest additions in VM...
==> default: Mounting shared folders...
default: /vagrant => /Users/neilg/vagrantstart
Connect to the Vagrant Box
To actually connect to the box use ssh and you will be in the home of the VM box
vagrant ssh
You can also verify its running in Virtual Box

Whilst in your Vagrant box your starting directory point is /home/vagrant – it is the vagrant directory at the root /vagrant which shares the same content as your initial project directory. This is a key thing, it essentially mirrors the 2 directories so the content in your project folder will also be in the /vagrant directory on the Vagrant Box.
Installing Apache Web Server
Create a bootup script that will upgrade the OS and install Apache when the Vagrant box is booted up, so still in your initial project directory on macOS or in /vagrant on the Vagrant Box. You need to create a script and also edit the VagrantFile to include the script, if you use the Vagrant Box to edit the file you’ll need to use vi or nano , but install it first.
sudo yum -y install nano
The bootstrap script also changes the webroot directory to be our project directory named /vagrant in our remote vagrant box instance, and also starts the webserver.
nano bootstrap.sh
And add the content:
#!/usr/bin/env bash

yum update
yum -y install httpd
rm -rf /var/www/html
ln -fs /vagrant /var/www/html
service httpd start
Then include this bootstrap.sh file in the Vagrantfile
nano VagrantFile
# Every Vagrant virtual environment requires a box to build off of.
config.vm.box = "chef/centos-6.5"
config.vm.provision :shell, path: "bootstrap.sh"
Then reload the Vagrant Box by issuing, if you are in the box you need to exit :
vagrant reload --provision
Set up Port Forwarding
To use our local browser to see files served from our remote vagrant box you need to forward a port, open the VagrantFile again and search for and uncomment the line below
config.vm.network "forwarded_port", guest: 80, host: 8080
Then refresh the vagrantbox
vagrant reload --provision
Now we can access the remote Vagrant Box via the local browser by going to – http://127.0.0.1:8080
If you are using the Port 8080 for another AMP stack like MAMP use another port number.
When you vagrant ssh back to your box and move into the /vagrant directory this will be your webroot structure, web serving files in the /vagrant directory
[vagrant@localhost vagrant]$ ls
bootstrap.sh  cgi-bin  error  html  icons  Vagrantfile
Sharing Your Vagrant Box
Now that the development environment is up and running, well al least with Apache, you can share that local/remote Vagrant Box with others outside of your network. You need to create a free account at the Vagrant Cloud. Then login at the Terminal
neilg@[~/vagrantstart]: vagrant login

'In a moment we'll ask for your username and password to Vagrant Cloud.
After authenticating, we will store an access token locally. Your
login details will be transmitted over a secure connection, and are
never stored on disk locally.

If you don't have a Vagrant Cloud account, sign up at vagrantcloud.com

Username or Email:
Use your accounts login, then run:
vagrant share
And you will be given a URL which others can see, like so…
==> default: URL: http://delighted-steer-7422.vagrantshare.com
Keep the Terminal screen session active to keep the sharing going, when done enter ‘Control’ + ‘c’ to end the session, you can get another session by repeating the process.
Stopping The Vagrant Box
Couple of ways of finishing up with the Vagrant Box you can either suspend it to use again at the same point for later, halt it – which powers it down or you can destroy it which removes it completely:
To suspend the box use
vagrant suspend
To halt use
vagrant halt
To completely remove and delete the Vagrant box (which does not include the original downloaded image) run:
vagrant destroy
Starting the Vagrant Box
vagrant up